
Unity 2019.2.1f1, LWRP 6.9.1 and Shader Graph 6.9.1. You can get the article’s code and shaders here.
Dissolve effect used for gradual appearing/disappearing of characters, force shields, etc.
Opaque
In opaque rendering mode, this effect uses a texture, that is usually generated noise, as the mask to discard pixels.
Discarding means that for every fragment of your mesh, you sample the discarding mask. Take a value from any mask’s channel (for example, red) of the sample and compare it against the DissolveValue. If the value in the channel is less than the DissolveValue, then this pixel is excluded from rendering, otherwise it’s rendered.
DissolveValue is the value that controls the visibility of the object. This value is in the range from 0 to 1, where 0 is the fully visible object, and 1 is fully invisible (all fragments were discarded). Also, the value of any texture channel is in the range of 0 to 1.
Simple
AlphaClipThreshold input of Unlit Master Node can be used for the simple opaque dissolve shader. It will discard all fragments with the Alpha Less than provided value. (RMB click on any node to open the context menu in which you can select Open documentation)

You can set to Unlit Master’s Color, input any other texture, or use the same dissolve texture to see what order the pixels disappear in.
Texture disappears from dark to light pixels, because black colour has 0 in the red channel and white colour has 1 in the red channel.
With Border
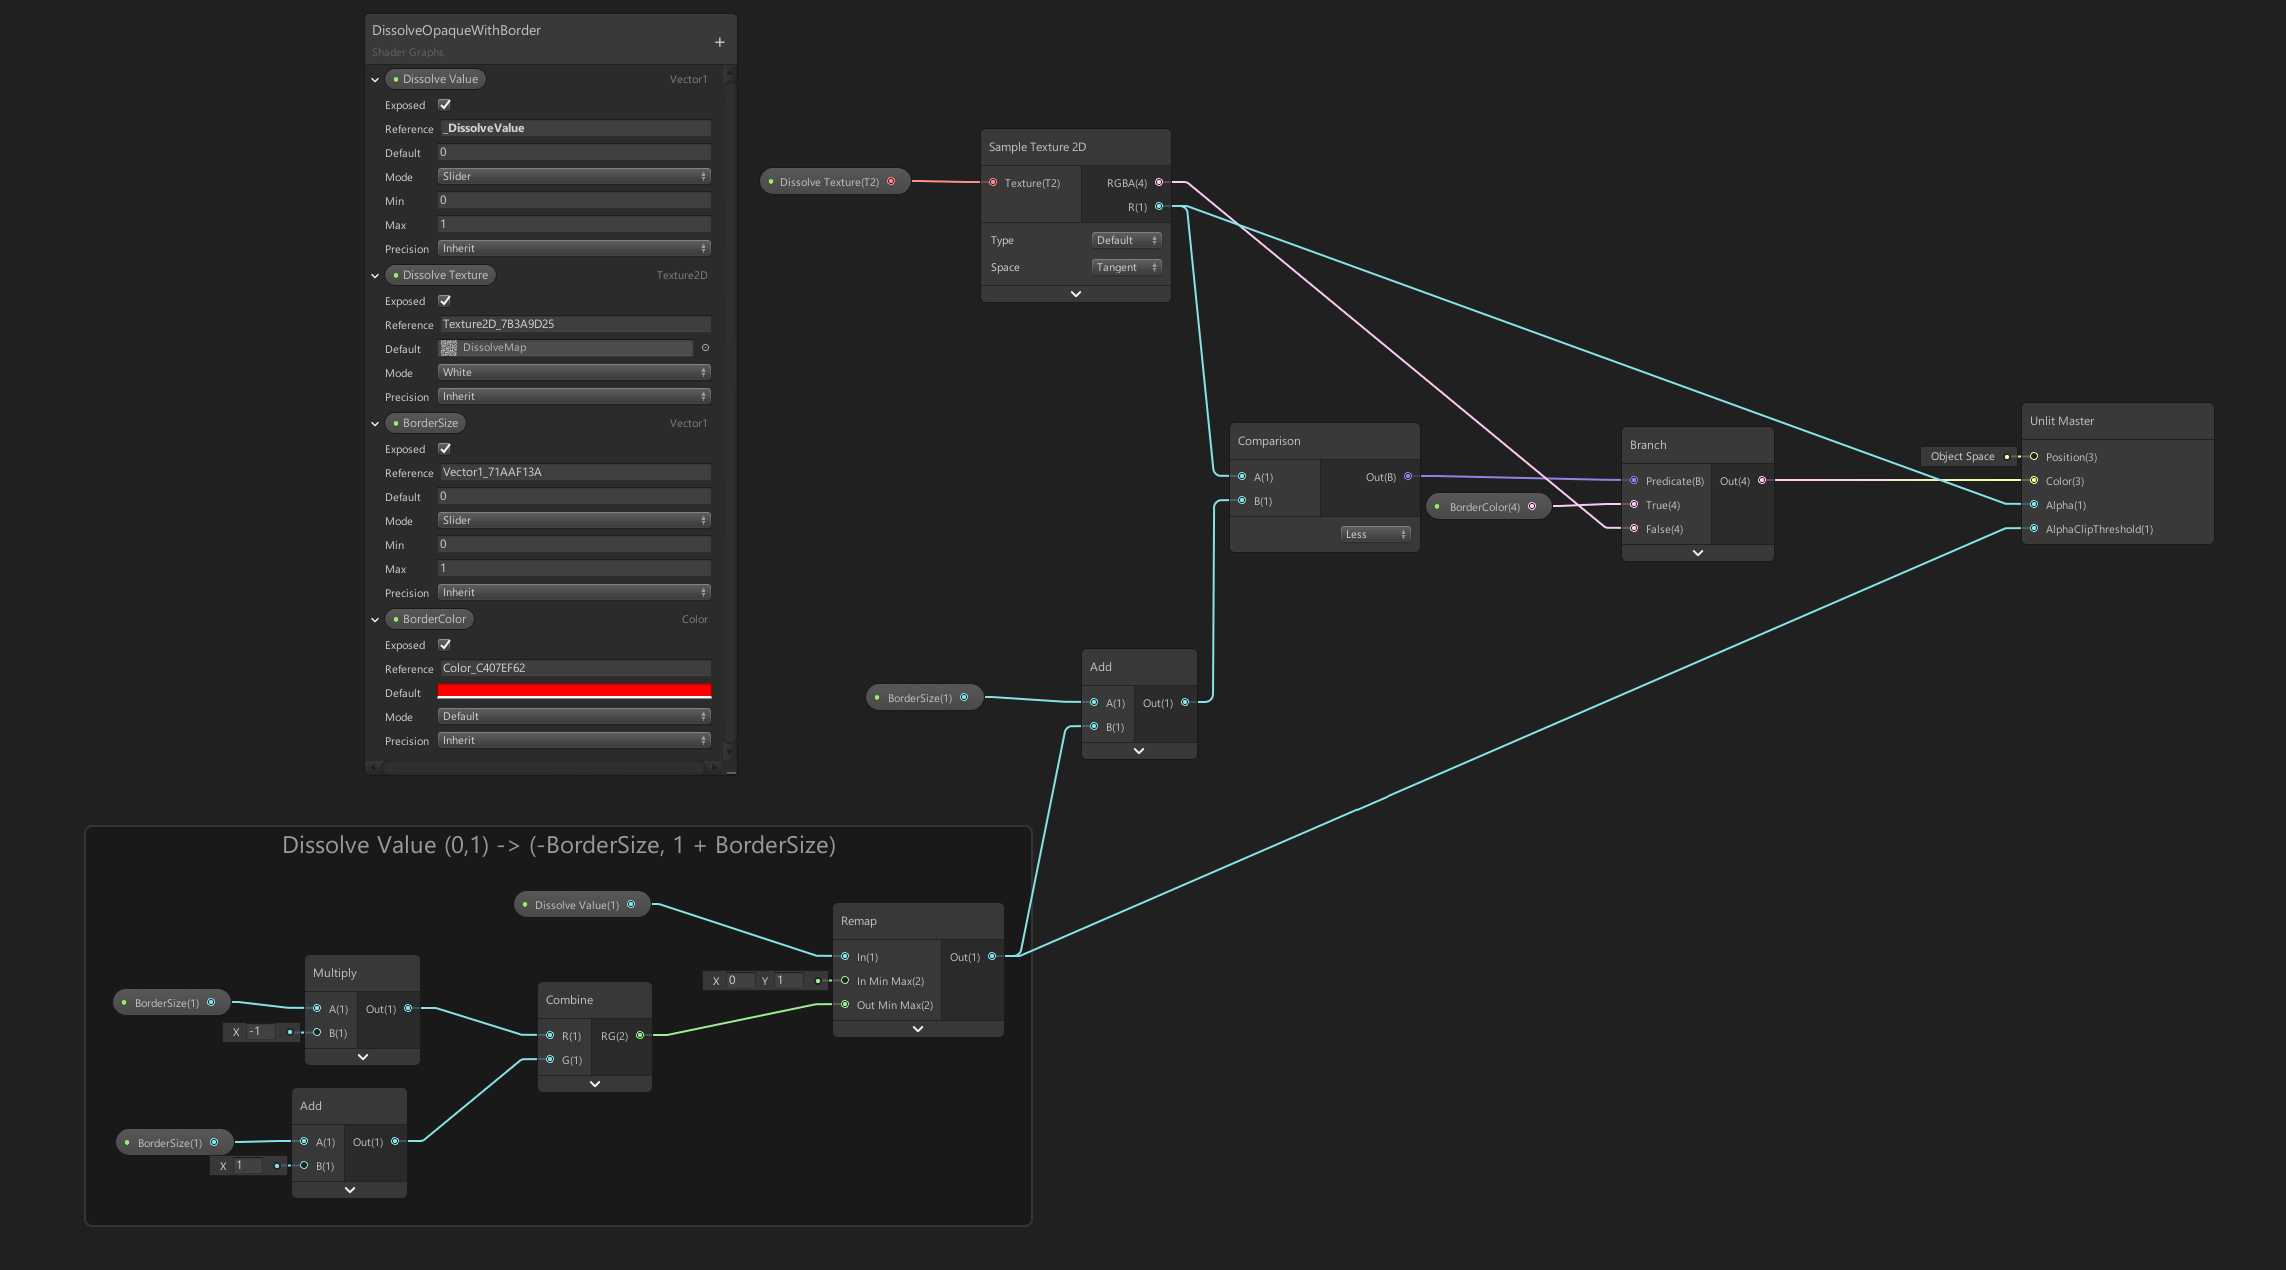
To add a border to dissolve set to Unlit Master’s Color input the BorderColor when the channel of texture is Less than DissolveValue + BorderSize.
But if you do it like this and, for example, set the BorderSize to 0.1, even when DissolveValue is 0 some pixels of the channel will be below 0.1, and you will see the border.
To prevent this, you need to use Remap node and remap DissolveValue from [0,1] to [-BorderSize, 1]. By doing that, the border won’t be visible when DissolveValue is between 0 and 1.
I remap to 1.01 because Unlit Master’s AlphaClip uses Less comparison. So when DissolveValue equals 1, pixels with 1 in the channel won’t be discarded.
With blending
In the previous graph, there is a rough border between the main color and the border color. It can be disguised using Bloom Post Effect if border’s colour is in HDR. But you can blend between the main color and the border color using Lerp Node based on the output from Smoothstep Node.
Smoothstep Node has several inputs: range(Edge1, Edge2) and a value(In). The node outputs value from 0 to 1 using this logic:
- If In Less than Edge1: 0
- If In Greater than Edge2: 1
- If In between Edge1 and Edge2: smooth Hermite interpolation between 0 and 1.

BorderBlend controls the distance between Edge1 and Edge2, when BorderBlend equals 0 Smoothstep Node doesn’t have distance to interpolate (Edge1 equals Edge2).
But when BorderBlend equeals 1 Smoothstep Node interpolates over all BorderSize. (from Edge1(DissolveValue) to Edge2(DissolveValue + BorderSize))

With gradient
Also, you can use the output of Smoothstep Node to sample a gradient texture.


Transparent
The main difference between opaque and transparent rendering modes is that in opaque pixels can only be in two states: rendered and discarded. But in the transparent mode, pixels can gradually change the transparency to create smooth disappearance.
Simple
With Border
Blending textures
Previously, you discarded pixels using the texture mask, but you can swap textures using it. This can be used to switch/blend between skins of a character.

You can get the article’s code and shaders here.